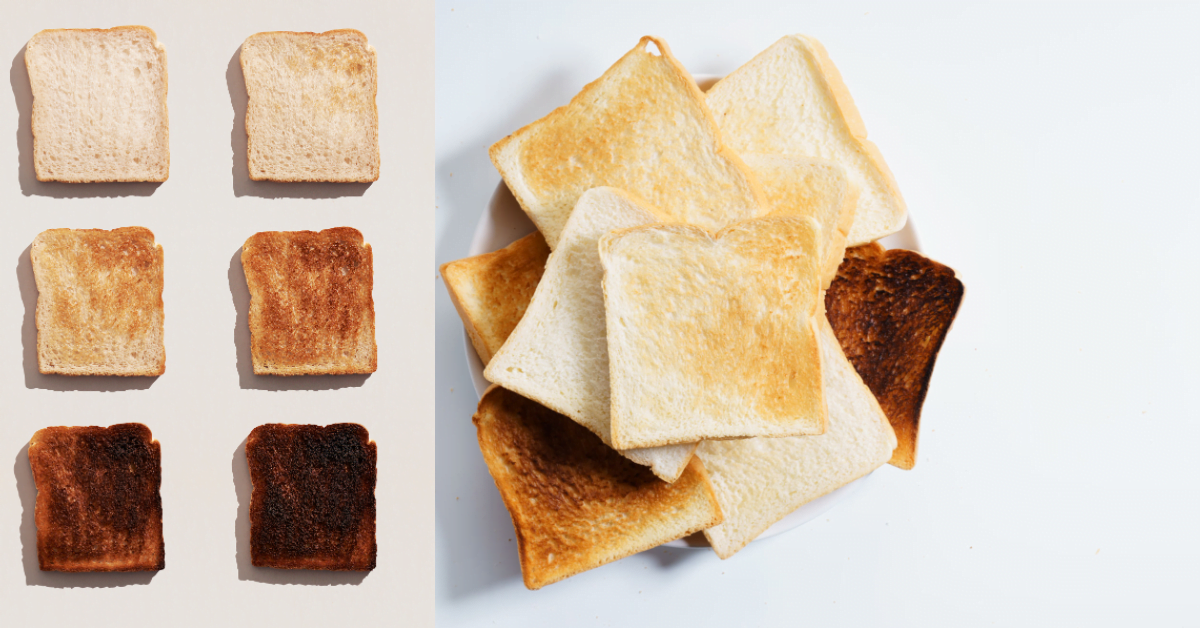
Toast is a breakfast classic that has been a staple in households around the world for centuries. Whether you prefer it lightly browned or almost charred, there’s no denying that the perfect shade of toast can make or break your morning meal. We’ll explore the world of toasting and help you understand the toaster 7 shade settings, so you can achieve that ideal level of toasty goodness.
The Basics of Toasting
Toasting is essentially the process of browning bread through exposure to radiant heat. It not only enhances the flavor of the bread but also makes it more palatable by creating a delightful crunch.
Here are the key factors that affect the toasting process:
- Temperature: The higher the temperature, the faster your bread will toast.
- Time: The duration of toasting determines how dark your toast will become.
- Moisture Content: Bread with higher moisture content will take longer to toast than drier bread.
- Bread Thickness: Thicker slices of bread may require longer toasting to achieve the desired level of browning.
Toaster 7 Shade Settings
Most toasters come equipped with shade settings that allow you to control the level of toasting. These settings are usually numbered from 1 to 7, with 1 being the lightest and 7 the darkest.
| -Buy a Smart Toaster with 7 Shade Settings | Check Price |
Let’s take a closer look at each setting to help you choose the right one for your taste:
1. Setting 1 – Lightest
- Appearance: At this setting, your bread will be lightly toasted, barely changing color.
- Texture: It will still be quite soft and flexible, with just a hint of crispness on the surface.
- Ideal for: Those who prefer their toast just a tad warmer than plain bread.
2. Setting 2 – Very Light
- Appearance: Slightly more color, but still quite pale.
- Texture: The bread will be a bit firmer than at setting 1, with a touch of crunchiness.
- Ideal for: A subtle toasting, good for sandwiches or as a base for toppings like butter and jam.
3. Setting 3 – Light
- Appearance: A light golden brown color.
- Texture: Slightly crisp on the outside while retaining a soft interior.
- Ideal for: A classic choice for most types of toasts, from avocado to peanut butter.
4. Setting 4 – Light-Medium
- Appearance: A deeper golden brown hue.
- Texture: The exterior will be notably crisp, while the inside remains tender.
- Ideal for: A versatile option that works well for a variety of toppings and fillings.
5. Setting 5 – Medium
- Appearance: A medium brown color with even browning.
- Texture: A well-defined crunch on the outside, with a warm and slightly chewy interior.
- Ideal for: Perfect for toast enthusiasts who enjoy a hearty, substantial crunch.
6. Setting 6 – Medium-Dark
- Appearance: A rich, dark brown color.
- Texture: A robust, crunchy exterior with a noticeably drier interior.
- Ideal for: Those who prefer their toast on the verge of being crunchy throughout.
7. Setting 7 – Darkest
- Appearance: A deep brown to near-black color.
- Texture: A fully crisp and dry texture.
- Ideal for: Adventurous souls who crave intensely toasted bread, excellent for making croutons or bruschetta.
Finding Your Perfect Shade
Choosing the right shade setting for your toast largely depends on personal preference and what you plan to pair it with.
Some tips to help you discover your ideal level of toasting:
Experiment
Start with setting 3, which is the classic choice for many. From there, try different settings to see which one suits your taste the best.
Toppings Matter
Consider the toppings or spreads you’ll be using. Creamy spreads like butter or avocado might pair well with lighter toasting, while heartier toppings like bacon and eggs might benefit from a darker shade.
Bread Type
The type of bread you use can also influence your choice. Thicker, denser bread may require a higher setting for even toasting.
Crispness Factor
If you prefer a crunchier texture, lean towards the higher shade settings, while those who enjoy a softer bite can stick with lower settings.
Time Constraints
On busy mornings, you might opt for a quicker toasting time on a higher setting, while leisurely breakfasts could accommodate a slower, lower setting for the perfect slice.
Be Mindful of Smoke
Toasters set to higher settings may produce more smoke, so be cautious in confined spaces.
Additional Tips for Perfect Toast
Achieving the perfect shade setting is just one part of making the ideal toast. Here are some additional tips to ensure your toasting experience is top-notch:
Use Fresh Bread: Fresh bread toasts better than stale bread. If your loaf is a few days old, consider reviving it by lightly moistening it before toasting.
Even Slices: Ensure that your bread slices are of uniform thickness to achieve consistent toasting across the entire piece.
Preheat Your Toaster: Preheating your toaster for a minute or two can help achieve more consistent results.
Safety First: Never leave your toaster unattended while toasting, as it can pose a fire hazard.
Clean Your Toaster: Crumbs and debris can accumulate at the bottom of your toaster, so regular cleaning can prevent unwanted burning or smoking.
Conclusion
Toast may seem simple, but the art of achieving the perfect shade can be a delightful journey. Whether you prefer a lightly kissed slice or a dark, crispy crunch, understanding your toaster’s shade settings is key to starting your day right. So, take the time to explore and experiment, and you’ll find your ideal shade in no time. Remember, the perfect toast is a reflection of your unique taste, and there’s no one-size-fits-all answer. Happy toasting!

